Bacon Egg Puff Pastry Breakfast Tart

Appliances Reviewed is reader-supported. When you buy through links on our site, we may earn an affiliate commission.
As an Amazon Associate I earn from qualifying purchases.

“a classic duo with an unforgettable taste”

Name a better breakfast duo than the infamous bacon and eggs! If pancakes come to mind, let me remind you that we’re taking a break from the sweet breakfast options, and instead, we’re focusing today on one incredibly delicious and creative twist to the most classic savory breakfast – bacon and eggs. One can argue that bacon and eggs are perfect on their own, but I like to experiment and try new flavors – this way, when I find something finger-licking good, I can share it with you guys. The bacon egg puff pastry breakfast tart turned out to be such a recipe.

It has bacon, eggs, cheese, and scallions for that sharp, sulfury taste. The pastry gives the meal an amazing pizza or pie quality, with incredibly crispy edges. This is why I love seasoning with oregano, but that’s totally up to your preference. You can use red pepper, cayenne, thyme, parsley, chili, garlic powder, and so on. I’m assuming you already know what you like on your plate, so feel free to adjust the seasoning to enjoy this breakfast tart even more.

Of course, maybe the most important question when it comes to breakfasts is – should you be an early bird to enjoy this meal? This bacon and egg pastry tart takes about 40 minutes from the time you begin preparing it to the time you eat it. However, the preparation time is only 10 minutes, which means you can let it bake while you get ready for the day.

To make the recipe, you’ll only need a baking sheet and the ingredients listed below.

The first step is to preheat the oven to (220°C) 425°F.

The second step is to prepare the pastry for baking. Lightly flour a baking sheet and roll the puff pastry sheet on it. The pastry sheet needs to be a little bit larger than the baking sheet so you can fold the edge and create a crust just like when making a pie.

After this, take a fork and poke a few hole throughout the center of the pastry to let the air out. This will prevent the pastry from rising during baking. Spread the cream cheese all over the center and brush the edges with the egg wash.

Place the baking sheet into the oven and bake for 15 minutes. Splitting the baking process into two parts is recommended because the pastry needs more baking time than the other ingredients. Plus, you’ll get a very crisp crust, with a soft and chewy center, which is perfect, right?

After 15 minutes, the pastry will get a light golden brown color, which is your signal to take it out of the oven and add the other ingredients.

First, spread the shredded white cheddar. You can also use parmesan, grana padano, or pecorino romano cheese, as they’re all very savory and hard-grating cheeses. Second, cut the bacon strips and place them over the cheese. On top of the bacon, crack the six eggs. Be careful not to crack the eggs one over another, but instead spread them throughout the tart, so they can cover the whole surface. Finally, add the diced scallions and season with salt, pepper, oregano, or anything that’s to your preference. Also, if scallions have a too intense flavor for you, chives are an amazing alternative with a milder taste.

I like to add raw spinach leaves over the tart because, at only 10 minutes or baking, they won’t dry out or be bitter, but instead will add a nice earthy flavor. If you’re a fan of spinach, I recommend you try this.

Return the baking sheet to the oven and continue to bake for another 10 to 15 minutes. The remaining time mostly depends on how well cooked you like your eggs. If you like them well cooked, leave the tart for 15 minutes. If you like them softer, bake for around 10 minutes.

Once the tart is baked, cut it into six equal squares and place one or two slices (depending on how much you think you can eat) on a serving plate and add your favorite sauce. Enjoy!


Prep Cooking time Total Servings
10 minutes 30 minutes 40 minutes 6

Ingredients

  • 1 sheet of puff pastry (thawed)
  • 1 cup shredded white cheddar
  • 6 eggs
  • 7 strips of bacon (cooked)
  • 1 egg wash (with 1 tbsp milk)
  • ½ cup of cream cheese
  • 1 tbsp diced scallions
  • 5-6 spinach leaves (optional)
  • 1 tsp oregano
  • A pinch of salt and pepper

Instructions

  • Preheat the oven to (220°C) 425°F.
  • Roll the puff pastry on a lightly floured baking sheet and fold the edges to create a crust.
  • Poke holes throughout the center od the puff pastry using a fork.
  • Spread the cream cheese over the puff pastry.
  • Brush the edges with the egg wash.
  • Bake for 15 minutes.
  • Take it out of the oven and toss the cheddar shreds over the pastry.
  • Cut bacon slices in half and place them over the cheddar shreds.
  • Crack the 6 eggs over the bacon slices.
  • Add the diced scallions.
  • Season with salt, pepper, oregano.
  • Place the spinach leaves on top.
  • Return to the oven and bake for another 15 minutes.

Single Serving Blueberry Muffin Mug

Single Serving Blueberry Muffin Mug

Appliances Reviewed is reader-supported. When you buy through links on our site, we may earn an affiliate commission.
As an Amazon Associate I earn from qualifying purchases.

“one muffin a day keeps the stress away”

Single Serving Blueberry Muffin Mug

Working days and busy schedules can be quite a challenge for our meal plan, let alone leave us time to prepare and enjoy a dessert, right? Well, no, because when our devotion to sweet things is put to the test, we adapt and create something like this yummy single serving blueberry muffin mug! It’s the perfect quick delight when you don’t have time to get messy in the kitchen.

It’s incredibly rich in flavor – sweet, yet with a touch of savory to really stimulate your taste buds and make you eat it in a heartbeat. I’m not kidding – one minute you’re taking it out fresh from the oven, and it’s gone the next!

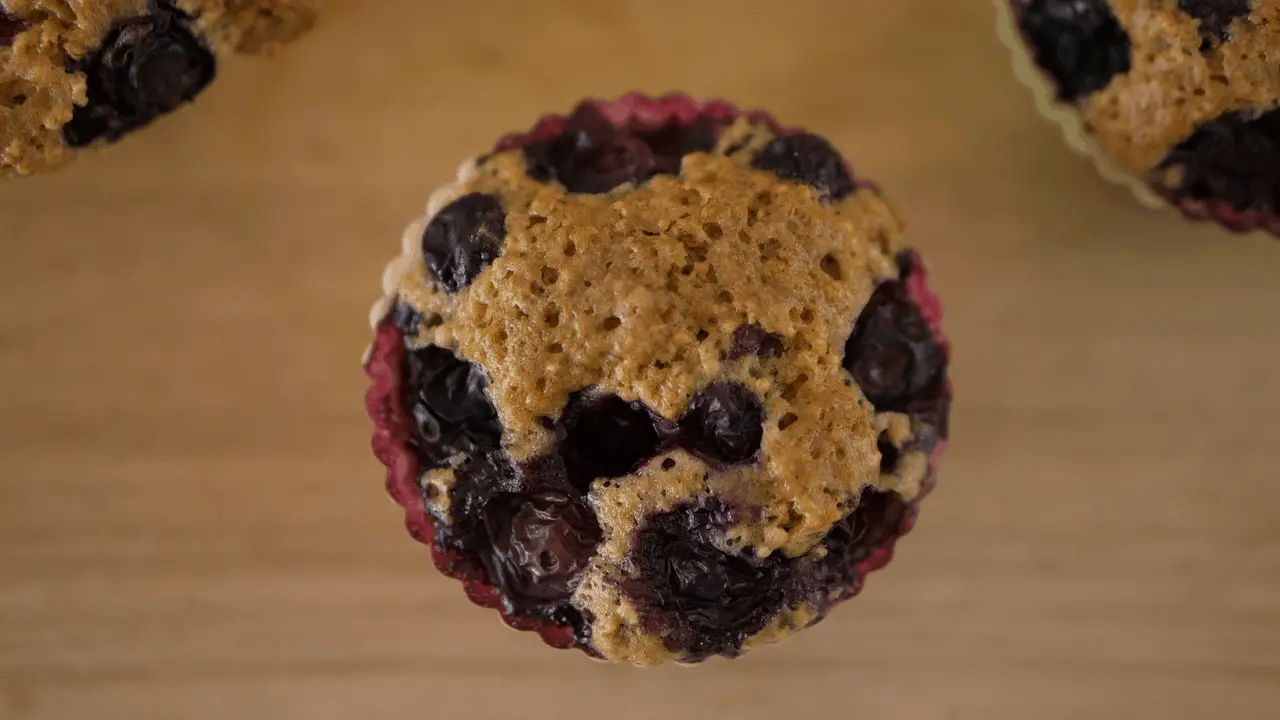
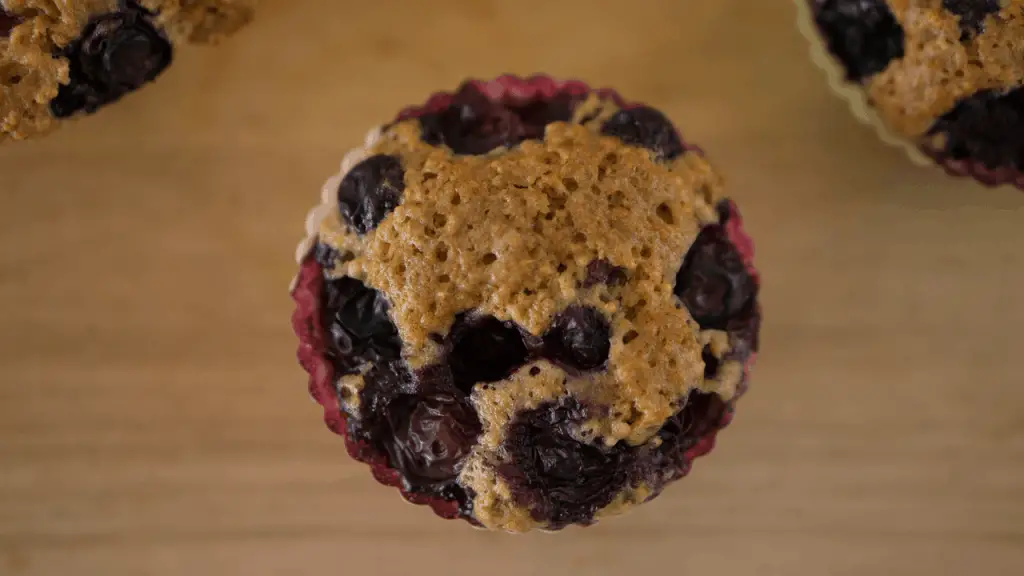
The muffin base is a little drier than cookie dough, but nevertheless very sweet and tender, which is why blueberries are perfect ingredients for muffins. They have a slightly sweet taste with just a touch of acidity. It’s when you bite the muffin that you’ll feel a pleasant “squirt” of juice that really makes you lick your lips in anticipation of the next bite.

Okay, my mouth is already watering, so let’s get down to business. To make this single serving blueberry muffin mug, you’ll need no more than 15 minutes in total, one oven-safe mug or bowl, another mixing bowl, and the ingredients listed below. Now, you may have noticed some of the ingredients are optional, and you can add them or leave them out depending on your personal preferences. For example, I love to sprinkle some lemon zest over my muffins because it enhances that slight acidity from the blueberries, which I adore, especially in my chocolaty deserts. However, if you’re not the person for it, no worries, you can totally skip it!

The first thing you want to do is preheat the oven. I know I usually forget to turn it on when I start preparing my meals, so here’s a friendly reminder! For baking muffins, I’ve found that 180°C (356°F) is the perfect temperature.

Next, take an oven-safe mug or bowl to mix in the dry ingredients for the muffin base – the flour, baking powder, brown (or regular) sugar, salt, and vanilla. Once the ingredients are well-combined, stir in the milk, olive oil, and butter (if you’re using). Butter makes the muffins more tender and moist, and it gives them a more familiar taste, but if you want a lighter dessert, that’s okay. Make sure the butter is well-melted before leaving the mug on the side to make the topping.

Take another mixing bowl and briefly beat together the flour, sugar, olive oil, and coconut flakes. When you get the right consistency, you can the mixture to the mug. But before you do that, first take the blueberries and add them over the muffin. Now, apply the topping over the blueberries.

Sprinkle lemon zest, or maybe chocolate chips (optional).

Place your mug in the preheated oven and let it cook for around 10 minutes.

Remember, it’s going to be very hot when you take it out, so use a protective pad to save your countertop! Finally, let the muffin cool off before eating it. That’s a perfect time to brew a nice cup of tea to enjoy with this muffin.

Considering that a typical oven can easily fit four mugs, you can make blueberry muffin mugs for your whole family or for when your friends when they come to visit and you want to surprise them with something sweet!


Prep Cooking time Total Servings
5 mins 10 mins 15 mins 1

Ingredients

For The Muffin: 

  • ¼ cup flour
  • ¼ tsp baking powder
  • 1 tbsp brown sugar
  • 2 tbsp milk (optional: plant-based)
  • 1 tbsp olive oil
  • 30-50g blueberries
  • A pinch of salt
  • A pinch of vanilla extract or powder
  • Optional: 1 tbsp butter

For the Topping:

  • 1 tbsp flour
  • 1 tbsp sugar (optional: powdered sugar)
  • 1 tbsp olive or almond oil
  • ½ tbsp coconut flakes
  • Optional: lemon zest

Instructions

  • Preheat the oven to 180°C degrees (356°F).
  • In a small oven-safe bowl or mug, mix together the dry ingredients: flour, baking powder, sugar, salt, and vanilla powder.
  • While stirring, add the milk, olive oil, and butter (if using). Make sure the butter is well melted, then set aside.
  • In another bowl mix in the flour, sugar, olive oil, and coconut flakes to make the topping.
  • Add the blueberries in the mug, then spatter the topping over the blueberries.
  • Place the mug in the oven and cook for 10 minutes.
  • Remove the mug carefully and let it cool at room temperature before eating.

Enjoy the muffin as a breakfast treat before starting your workday, or even better – surprise your kids and be a real supermom!

Strawberry Balsamic Pie for Pi Day

Appliances Reviewed is reader-supported. When you buy through links on our site, we may earn an affiliate commission.
As an Amazon Associate I earn from qualifying purchases.

“celebrating Pi day with luscious strawberry pie”


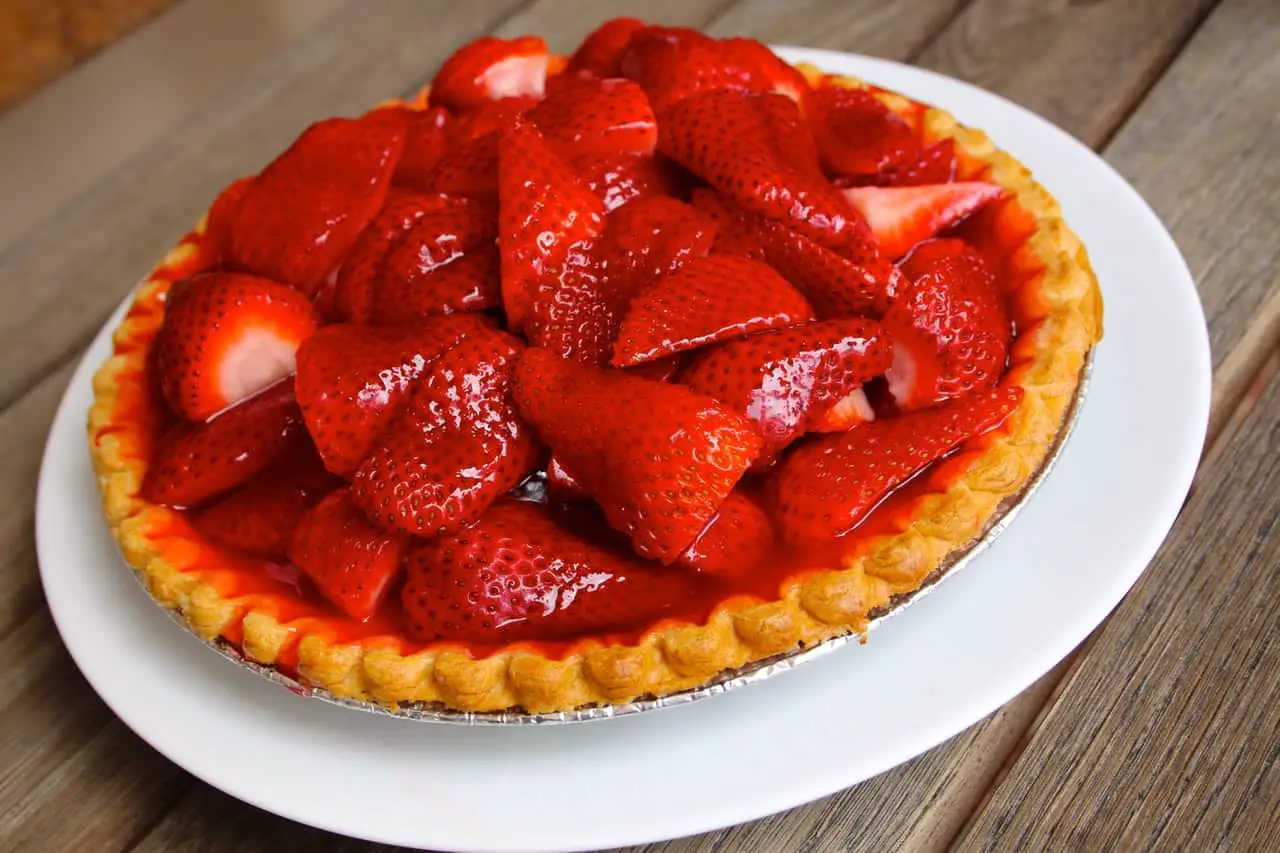
March 14th is getting close and it’s our job to find the perfect pie (or pieS) to celebrate this year’s Pi day! Since it’s a celebration, we’re not counting calories, so let’s make something super sweet that’s going to please our senses and leave us satisfied until we find yet another reason to make a pie! Does one really need a reason to enjoy a pie? I don’t think so, but if you do, now you have the perfect excuse.

To make this recipe, you’ll need a blender, mixing bowl, plastic film, pie dish, saucepan, and a lot of patience since delicious homemade pies take their time.

Start by mixing together the dry ingredients for the pie crust. Whisk together the flour, brown sugar, and salt. Place the mixture into a blender and add the cold butter cut into three to four pieces. Pulse until all the ingredients are well incorporated. After a couple of minutes of pulsing, you’ll get a crumbly paste. Transfer the batter into a large mixing bowl and beat it with a spoon until the dough starts to clump together. If your dough is sticky – don’t worry, that’s normal!

Place the dough on a kneading surface and roll it into a small flat circle, then wrap it tightly with a plastic film. Place it in the freezer for at least 30-40 minutes. If you can make the dough the day before and leave it in the freezer overnight, that would be perfect, but 40 minutes will work too.

While the dough is in the freezer, prepare the strawberry filling. Take a saucepan and place it over medium to high heat. Whisk in only half of the strawberries, together with the sugar, balsamic vinegar, lemon juice, and vanilla powder. Stir while the strawberries soften and lose their shape. Once the mixture starts bubbling, reduce the heat, and let it simmer for 30 minutes. Then, remove from the stove and the filling cool at room temperature for about 10 minutes.

The dough and the filling will be ready at about the same time. So, now it’s a good time to preheat the oven to 190°C (375°F).

After this, take a pie dish and grease it with cooking oil. Then, roll the dough on a lightly floured surface into a 10-inch circle and place it into the pie dish. Press with your fingers to make the dough fit the form of the pie dish. Cut the corners that fall out of the pie dish. Finally, take a fork and poke holes throughout the pie crust, so you can prevent it from rising too much while baking.

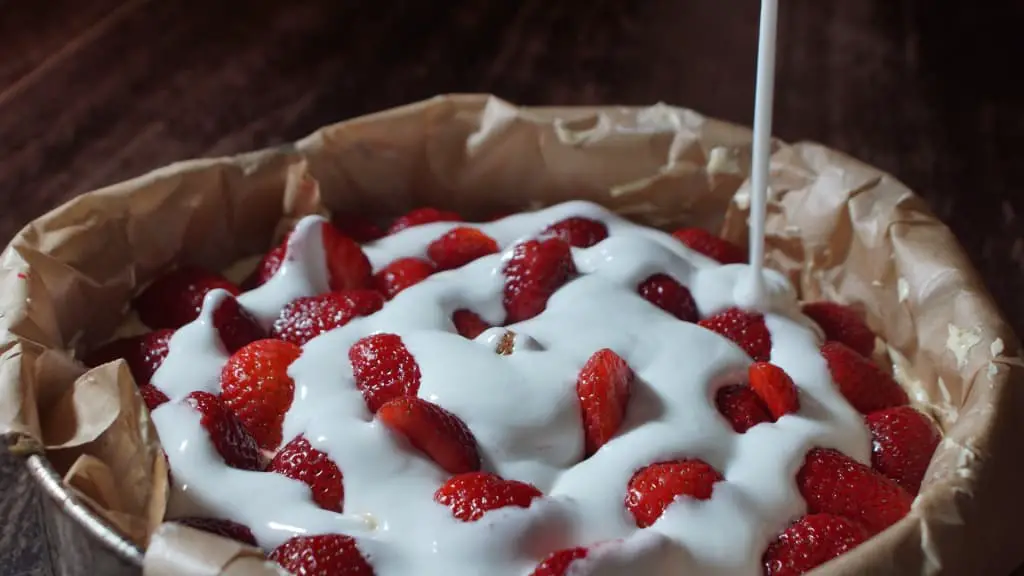
Take the strawberry filling and spread it over the pie crust. Prepared like this, place the pie into the oven and bake for 30 to 40 minutes. Take it out only to add the remaining strawberries over the strawberry filling, then continue to bake for another 20 to 30 minutes.

When the crust gets a nice golden color, you can take the pie out of the oven and let it cool at room temperature for at least 20 minutes before serving. It will be tough, I know, but resist the temptation to eat it right away because the taste is much much better once it’s cooled.


Prep Cooking time Total Servings
1 hour 1 hour 2 hours 8

Ingredients

For the pie crust:

  • 2 cup all-purpose flour
  • 1 cup butter (cold)
  • 1 tbsp brown sugar
  • 10 tbsp cold water
  • A pinch of salt

For the filling:

  • 5 cups fresh strawberries (hulled and halved)
  • ½ cups of brown sugar
  • 2 tbsp Balsamic Vinegar
  • ½ tbsp lemon juice
  • 1 tsp vanilla powder

Instructions

  • Take a large bowl and whisk together the flour, brown sugar, and salt.
  • After this, transfer the mixture into a blender and add the butter. Mix until the ingredients are well combined and the mixture becomes pasty.
  • Transfer the batter into a bowl and gradually add the water. Beat it until the dough is crumbly, but clumps together.
  • Place the dough and on a board and form a circular shape. Wrap it with a plastic film, then place it in the fridge for 40 minutes (overnight is good too).
  • Take a large saucepan and place it over medium to high heat. Whisk in half of the strawberries, sugar, balsamic vinegar, lemon juice, and vanilla powder.
  • Once the mixture starts to boil, reduce the heat to low and let it simmer for 30 minutes. Stir occasionally.
  • After 30 minutes, remove from heat and let it rest at room temperature.
  • Remove the dough from the fridge and let it rest at room temperature for 10 minutes. After this, roll it on a lightly floured surface into a 10-inch circle.
  • Preheat the oven to 190°C (375°F).
  • Grease the pie dish with cooking oil.
  • Place the dough in the pie dish and press with your finger to fit the dish form. Cut the extra dough from the sides, if needed.
  • Take a fork and make holes throughout the dough, to prevent it from rising.
  • Spread the strawberry filling over the dough.
  • Place it in the oven and bake for 30 minutes.
  • Add the remaining strawberries over the strawberry filling and return to the oven for an additional 30 minutes.
  • Once the pie is baked, let it cool at room temperature for 20 minutes.

Strawberry Jam Buttermilk Coffee Cake

Appliances Reviewed is reader-supported. When you buy through links on our site, we may earn an affiliate commission.
As an Amazon Associate I earn from qualifying purchases.

“the missing piece to your afternoon coffee”


Are you in for a yummy strawberry jam buttermilk coffee cake? The name is a mouthful, I know, and can be a little bit confusing – coffee cake without the coffee? So, let’s just address this right from the beginning.

Traditionally, coffee cakes were not called coffee cakes because they contained coffee, but because they were eaten over a cup of coffee. Can you remember any commercial or billboard for coffee brands and coffee shops? If you do, chances are there’s a delicious treat next to the coffee mug. I believe the name naturally became a trend because people fell in love with the whole ritual of sharing their afternoon coffee with friends while enjoying a tasty piece of cake. So, coffee and cake became a worldwide symbol for a pleasurable, relaxing time.

Are you thinking of inviting your friends over for a cup of coffee? Let’s make this delightful strawberry jam buttermilk coffee cake and make your rendezvous even lovelier.

To make this cake, you’ll need three mixing bowls, a 9-inch springform cake pan, and the ingredients listed below. However, don’t forget you need to stock up on coffee, too, especially if you have guests coming in.

The preparation time is no more than 15 minutes, while the baking time takes around 50 minutes. If you don’t have a 9-inch springform cake pan, you can use a different dimension or even shape (rectangle pan, loaf pan, square pan, etc.), but keep in mind that you need to change the baking time and the amount of the ingredients. Never fill the baking pan to full – ⅔ of its height is perfect – and always keep an eye on your cake while baking.

The first step is to preheat the oven to (180°C) 350°F, so it’s ready for baking while you prepare the batter.

The next step is to make the cake batter. Take a medium-size mixing bowl and combine the flour, baking powder, baking soda, and a pinch of salt. After you mix the ingredients, set the bowl aside.

Take a large mixing bowl and whisk together the wet ingredients – the eggs, buttermilk, sugar, vanilla extract, and the shortening. After the ingredients combine, gradually stir in the flour mixture. Once you get a smooth and creamy batter, set the bowl aside.

The final step is to prepare the cake pan and bake the cake. To do this, take the cake pan and grease it with cooking oil or melted butter. After this, pour the cake batter, filling ⅔ of the pan.

Place the pan in the oven and bake for 30 minutes.

After 30 minutes, take the cake out of the oven and pour the strawberry jam over it, then toss the sliced strawberries on top and sprinkle with granulated sugar. Return the cake in the oven and continue to bake for another 20 minutes.

Usually, this is a good time to start preparing the glaze – 10 minutes before the cake is baked. Crush the five strawberries in a small mixing bowl until you make a puree. After this, add the rest of the ingredients, except the pecans. Whisk in the powdered sugar, cream, and vanilla extract. Stir for a minute or two. After the blend becomes smooth and has a nice and creamy consistency, you can set it aside.

Once the cake is baked, take it out of the oven and place it on the rack. Toss the chopped pecans over the cake and spatter the glaze. However, don’t just pour the glaze, be creative and make an interesting pattern. I know the taste is important, but a visually pleasing cake is like the cherry on top – makes the whole experience much more pleasant.

Let the cake chill for 10 minutes while you make the coffee, then serve and enjoy!


Prep Cooking time Total Servings
15 mins 50 mins 1 hour, 5 mins 8

Ingredients

  • 2 cup all-purpose flour
  • 4 tablespoons shortening (melted)
  • 3 tbsp sugar
  • 2 egg
  • ½  tsp baking powder
  • ½ tsp baking soda
  • 1 tsp vanilla extract
  • 2 ½ tbsp buttermilk
  • 1 cup of sliced strawberries
  • ⅓ cup of strawberry jam
  • 1 tsp granulated sugar
  • A pinch of salt

For the glaze and topping:

  • 1 cup powdered sugar
  • 5 strawberries
  • 2 tbsp cream
  • ½ tsp vanilla extract
  • ¼ cup chopped pecans

Instructions

  • Preheat the oven to (180°C) 350°F.
  • Take a small mixing bowl and combine the flour, baking powder, baking soda, and a pinch of salt.
  • Whisk the eggs, buttermilk, sugar, vanilla extract, and shortening in a large bowl. Once the ingredients are combined, stir in the flour mixture.
  • Take a 9-inch springform cake pan and grease it with cooking oil or butter.
  • Add the batter into the cake pan and bake for 30 minutes.
  • After this, take the cake out of the oven and dollop the strawberry jam over it.
  • Toss the sliced strawberries on top and sprinkle the granulated sugar.
  • Return the cake in the oven.
  • Bake for another 20 minutes.
  • 10 minutes before the cake is done baking, prepare the glaze. Take a small bowl and crush 5 strawberries to make a strawberry puree. After this, stir in the cream, vanilla extract, and powdered sugar. Whisk all the ingredients until you get a soft and creamy consistency.
  • Once the cake is done baking, remove the pan and place it on the rack. Sprinkle the chopped pecans and pour the spatter the glaze on top, then let it sit for 10 minutes before serving.

Skillet Mac & Cheese Pizza Style

Appliances Reviewed is reader-supported. When you buy through links on our site, we may earn an affiliate commission.
As an Amazon Associate I earn from qualifying purchases.

“a heavenly combination of two of the most loved flavors”

How many nights have you thought about what’s better, pizza or mac & cheese? Maybe you even debated it with your foodie friends? I know I have thought about it long and hard, and then some while back, I found this recipe titled “Pizza Mac & Cheese,” and I was like, why hasn’t this occurred to me before!

Long story short, I experimented with it for a while until I found that sweet spot, between the two most popular meals, that makes my mouth water just thinking about it.

So, before I go and make it one more time, here’s the recipe.

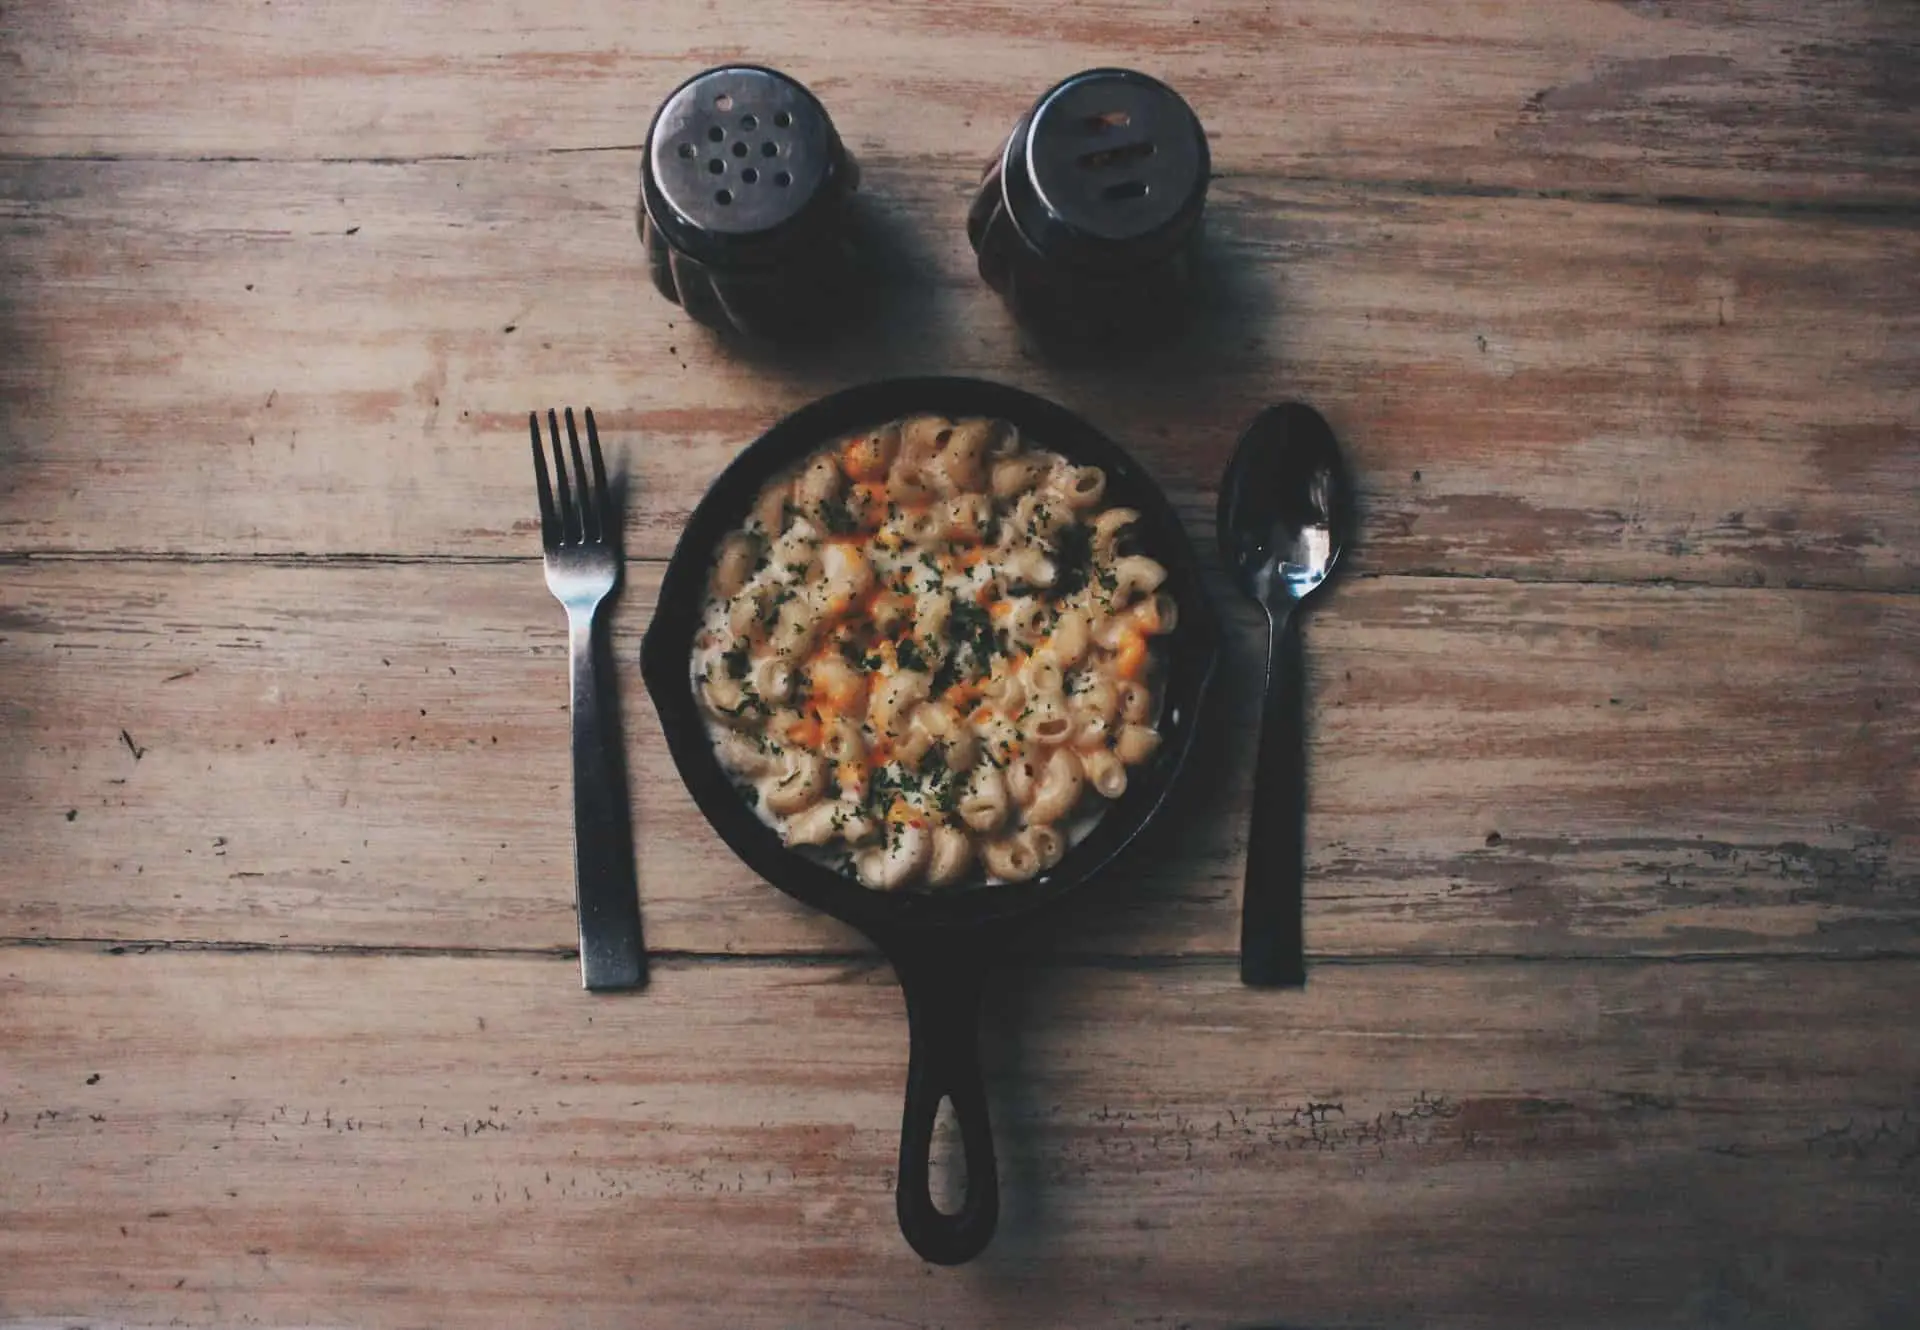
Everything you’ll need for this recipe, except for the ingredients listed below, is one saucepan and an oven-safe skillet. It won’t take much time, as the whole prep and cooking time takes around 40 minutes, including the boiling time for the macaroni. So, let’s start cooking.

The first step is to prepare the macaroni. Boil 1 litre (4 ½ cups) of water in a large saucepan. Add a little bit of salt, olive oil, and the macaroni. Let them cook from around 8 to 11 minutes. Make sure to follow the instructions on the package because if you overcook them, they’ll become too soft, and they won’t hold up when you continue cooking them afterward.

When the pasta is done, retain one cup of the pasta water, while you drain the rest. Rinse them with cold water and set them aside.

The next step is to add 1 tsp of olive oil in the oven-safe skillet and let it heat for a few minutes over medium heat. Meanwhile, you can prepare the onion. Cut it into tiny pieces (a mandolin slicer makes this really easy) and add them to the skillet. Cook for one to two minutes until the onion becomes translucent.

In the meantime, pre-heat the oven to 250°C (500°F), so that it’s ready when you’re done sauteing the meal.

When the onion is ready, add the butter and stir until it melts completely. While you continue to stir, slowly add the flour to create a roux. Now, I personally know how easy you can burn the roux, so keep stirring all the time. After a few minutes, pour in the milk and let it cook until it boils. Just make sure there’s no onion stuck at the bottom of the skillet. Mix everything well.

The next ingredients to add are the tomato sauce, the Italian seasoning, and the salt and pepper. It’s your choice whether you want to skip the seasoning or add something you prefer, it’s totally okay, even encouraged! I’m sure many people wouldn’t mind oregano, although I personally prefer to sprinkle just a little when I’m serving the dish.

Again, mix everything and then add the macaroni, only half of the pepperoni slices, and just a little over half (one cup) of the mozzarella cheese. Once everything is well combined, and the mozzarella is melted, you’ll feel just how creamy the whole mixture is.

If it’s too thick or dense for you, now it’s the time to use that cup of pasta water you reserved for this purpose. Pour the water really slowly as you can always make the meal more watery, but at this point, you can’t make it creamier. This is completely optional, of course, and depends on your personal preference.

Turn the stove off and set your skillet aside. Sprinkle the parmesan cheese (or cheddar) on top, then layer the rest of the pepperoni slices, and finally, scatter the rest of the mozzarella cheese over the pepperoni. Now, your mac and cheese pizza is ready for the oven. However, be careful not to leave it in for too long. If your oven is pre-heated, you’ll see the mozzarella on top melting and becoming brown in just 4-5 minutes – this is your sign to take it out.

It’s great if the cheese is a little brown here and there, but it shouldn’t be burned!

Finally, take the pizza slash mac and cheese out of the oven – can you smell it? Trust me, you’ll be completely taken over by that delicious smell, but don’t rush! It will be hard to taste anything if you burn your tongue. Let the meal cool for 15-20 minutes at room temperature while you prepare the table for dinner. If you have kids, this is not a meal that they’ll protest, so be ready for refill requests! Enjoy!


Prep Cooking time Total Servings
5 minutes 40 minutes 45 minutes 8

Ingredients

  • 1 box macaroni (ELBOWS)
  • 1 tsp olive oil
  • 1 onion (minced)
  • 3 tbsp all-purpose flour
  • 4 tbsp butter
  • 1 ½ cups (375ml) whole milk
  • 100g (4oz) of tomato sauce
  • 1 ½  cup shredded mozzarella cheese
  • 1 cup shredded cheddar or parmesan cheese
  • 1 tsp Italian seasoning
  • 1 package pepperoni slices (~100g)
  • A pinch of salt and pepper

Instructions

  • Cook the elbow macaroni in boiled water with a little salt and a few drops of olive oil for 8-11 minutes (depending on the package instructions).
  • When cooking is complete, reserve one cup of pasta water. Drain the macaroni and rinse them with cold water. Set aside.
  • Preheat the oven to 250°C (500°F).
  • Take the skillet, add olive oil, and let it heat over medium heat.
  • Add the onion and cook for a minute or two, then add the butter. When it melts, stir in the flour to create a roux. Be careful not to burn it – stir all the time.
  • Next, add the milk and let the mixture boil.
  • Stir in the tomato sauce, Italian seasoning, salt and pepper (to taste).
  • Finally, add one cup of the mozzarella cheese, macaroni, and half of the pepperoni slices. Mix everything well. If the sauce is too thick, use the pasta water to make it thinner.
  • On top, sprinkle the parmesan cheese, one layer or pepperoni slices, and the remaining mozzarella cheese.
  • Place the skillet in the oven until the cheese melts and starts to get brown (3-5 minutes).
  • When cooking is complete, leave it for 15-20 minutes at room temperature to chill.

NY Style Blueberry Bagels

Appliances Reviewed is reader-supported. When you buy through links on our site, we may earn an affiliate commission.
As an Amazon Associate I earn from qualifying purchases.

“the perfect breakfast comes in the shape of a bagel with the blueberry flavor”

For the love of breakfast pastry goodies, today we’re cooking the popular NY style bagels with blueberries as the main ingredient. If you’re looking for more ideas along this line, you can also check the delicious faux cronuts recipe I recently posted.

Did you know that the main difference between the bagels in NY and Montreal is that in Montreal the bagels are boiled in water sweetened with honey, while the New Yorkers claim it’s their water quality that makes the bagels so specific?  Now, I thought about which style would be better for my recipe, and although I’ll be making a sweet bagel breakfast recipe I thought the Montreal style would be a bit too much. The more neutral quality of the NY style dough would fit perfectly with the sweet, yet slightly acidic taste of the blueberries. Plus, let’s face it, it’s hard to find someone who has something against the New York bagels. So, for the souls that like their breakfast sweet, let’s make some NY style blueberry bagels.

To make this recipe, you’ll need a large saucepan, one big mixing bowl, and another regular mixing bowl, baking tray, parchment paper, and the ingredients listed below. The total time for making NY style blueberry bagels is around 3 hours because you need to wait for the dough to rise, so organize your time accordingly. You can also make the bagels the night before and eat them the next morning.

The whole recipe is really straightforward and easy-to-follow. The first step is to make the bagel dough. Take a large mixing bowl and whisk together the flour, sugar, salt, yeast. As you can see in the ingredients’ list I recommend using instant yeast because you can whisk it directly with the other dry ingredients. However, if you’re using active dry or another type of yeast, follow the instructions on the package. Active dry yeast, for example, needs to be dissolved in water before using it.

Once the ingredients are combined, start adding water slowly. To make a smooth and elastic dough you’ll probably need around 2 cups of water (room temperature), but don’t let the amount of water confuse you. Start with a very low amount of water and add more as you beat the batter, so you can feel and control the consistency. Finally, add the blueberries and continue to beat until they’re mixed within the dough. After this, transfer the dough to a floured surface and knead for 5 to 7 minutes. The final result should be a dense, yet soft and elastic dough. Grease a bowl and place the dough in it. Cover it with foil and leave it at room temperature for 1 hour. During this time it should double its size. However, after an hour if it still hasn’t risen enough, wait for 15 to 30 minutes more.

Once the dough is ready, cut it into 7 to 9 tennis or baseball sized balls. Roll each ball to make a circle and make a hole in the center to form the shape of a bagel. Keep in mind that bagels are usually 3,5 to 4 inches in diameter, so try not to make them too big or thin.

Take a large saucepan and boil water over high heat. Once the water starts bubbling, you can start boiling the bagels. Boil each bagel separately, typically 4 minutes for each bagel.

While the bagels are being boiled, you can preheat the oven to 220°C (425°F). Another thing you can do while the bagels are being boiled is to line the baking sheet with parchment paper and then grease it with cooking oil or butter.

After you finish boiling the bagels, line them in the baking sheet. Brush them with melted butter and sprinkle nutmeg all over them. Place the baking sheet in the oven and bake for 20 minutes.

During this time, you can make the filling. Of course, you can totally skip this step and eat the bagels with a glass of warm milk or orange juice, but personally, I believe the strawberry filling is extremely delicious and fits perfectly inside the blueberry bagel. Plus, it’s really easy to make.

First, take 5 strawberries and crush them in a mixing bowl until you get a juicy puree. Then, add the rest of the ingredients for the filling – the cream cheese, sugar, and heavy cream. Whisk until you get a creamy, soft-pink filling. Take the other 5 strawberries, cut them into small pieces, and add them in the filling. Stir one more time, then place the filling in the fridge to cool while the bagels are baking.

When cooking is complete, take the bagels out and let them cool at room temperature for 10-15 minutes.

Before serving them cut each bagel horizontally and spread the filling on the inside of each bagel. Stick the two pieces back together and serve with coffee, juice, milk, or fresh fruit, the choice is yours.

Now I know I’ve said multiple times that this NY style blueberry bagel recipe is the perfect breakfast, but you can also make it as a tasty dessert for your friends and family or for any special occasion. You can’t go wrong with the bagels because everyone will lick their fingers and thank you more than once! Enjoy!


Prep Cooking time Total Servings
2 hours, 30 mins 20 mins 3 hours 4

Ingredients

  • 4 cups all-purpose flour
  • ¼ oz instant yeast
  • 3 tbsp sugar
  • 1 cup blueberries
  • 2 tbsp butter (melted)
  • 2 tbsp nutmeg
  • 1 tsp salt

For the filling: 

  • 4 oz (115g) cream cheese
  • 1 cup powdered sugar
  • 10 strawberries
  • ½ cup heavy cream

Instructions

  • Take a large mixing bowl and whisk together the flour, sugar, salt, yeast. When the ingredients are well-combined, start adding a little water. You’ll need around 2 cups of water. Add 1 cup first, and after you make the dough, see how much more you’ll need to get it to be soft and elastic.
  • After adding 1 cup of water, fold in the blueberries and beat it until they’re well mixed.
  • Place the dough on a board and knead for 5-7 minutes, until the dough is smooth and there are no lumps.
  • Grease a bowl with butter or cooking oil and place the dough in it. Cover it with foil and let it rest for 1 hour. After one hour, the size should be doubled.
  • Take the dough and divide it into 7-9 tennis size balls.
  • Roll each ball into a thick circle and make a hole in the middle to form the bagel shape. Make sure you don’t make the circles to big and thin. Bagels are typically 3.5 to 4 inches.
  • Preheat the oven to 220°C (425°F).
  • Take a large saucepan and boil water over high heat.
  • When the water starts bubbling, boil each bagel for 4 minutes, separately.
  • Take a baking sheet and line it with parchment paper.
  • Place the bagels on the baking sheet. Brush each bagel with the melted butter and sprinkle nutmeg.
  • Bake the bagels for 20-25 minutes.
  • While the bagels are baking, make the filling.
  • Take 5 strawberries, place them in a larger bowl, and crush them until you get a juicy puree.
  • Whisk in the cream cheese, heavy cream, and powdered sugar. Mix until you get a creamy soft-pink filling.
  • Cut the remaining 5 strawberries into small pieces and add them into the filling. Mix one more time, then place the filling in the fridge.
  • When cooking is complete, take the bagels out and let them cool at room temperature for 10-15 minutes.
  • Cut each bagel horizontally into two pieces. Spread the filling on the inside of one of the bagel pieces then stick the pieces together.
  • Serve and enjoy!

Red Velvet Hot Cocoa

Red Velvet Hot Cocoa

Appliances Reviewed is reader-supported. When you buy through links on our site, we may earn an affiliate commission.
As an Amazon Associate I earn from qualifying purchases.

“a sweet gift for your tongue that can warm your heart”

Red Velvet Hot Cocoa

If you love a red velvet cake, you’re going to absolutely adore this sweet hot cocoa variation that’s very easy to prepare. If you have a sweet tooth, then this might be the perfect treat for whenever those sugar cravings kick in.

Let’s face it – we don’t always have one to three hours to make that delicious, creamy chocolate cake we saw on the cooking channel. I mean, it’s an amazing dessert idea for special occasions and when you’re expecting guests, but what’s a better alternative when it’s just you and you don’t have much time? I’ll tell you – red velvet hot cocoa!

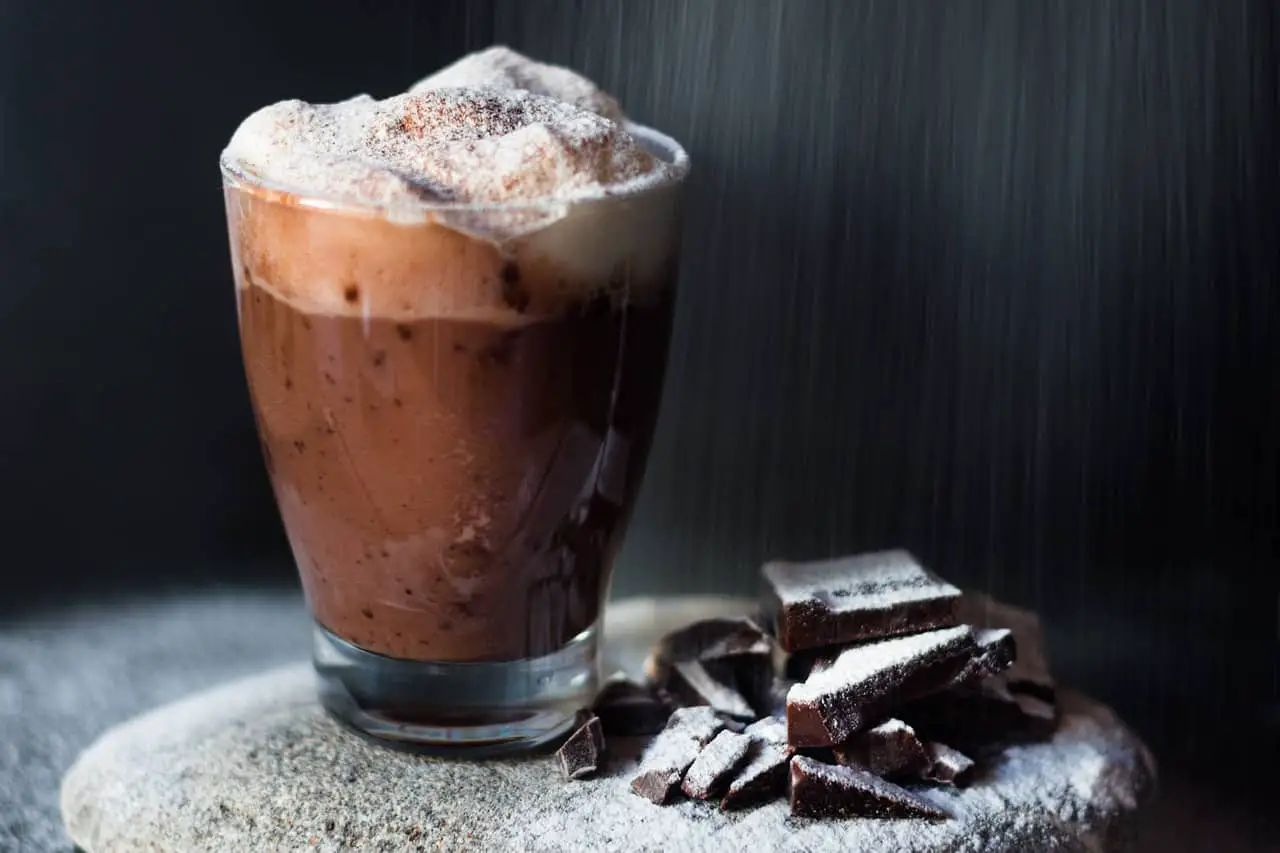
I’m actually doing this little mug filled with pure happiness a little bit of an injustice, as it’s more than a cake alternative and it deserves to have a special spot in the dessert menu. It’s that good! You’re looking at a very dense, creamy drink with chocolate flavor and a hint of caramel, due to the maple syrup. Prepare yourself for the familiar mouthwatering taste of chocolate, yet with an untypical and uniquely delicious twist. The distinctive red color makes the whole experience even more special.

So, without further ado, let’s get our hands chocolaty! You won’t need more than 15 minutes in total, as the preparation time is no more than 5 minutes, and the whole cooking time no more than 10 minutes. The recipe below is for a single serving, but feel free to double or triple the ingredients for whenever you want to share a cup of hot cocoa with your friends and family.

Everything you’ll need to make this recipe, aside from the ingredients, is one big saucepan, one metal bowl (if you have a double boiler that’s even better), a hand mixer (or another alternative), and your favorite mug. Sounds pretty simple, right?

The first thing you need to do is boil water over high temperature on the stove. Once the water starts boiling, turn the heat on medium, and place a metal bowl on top. Keep in mind, the bottom of the metal bowl shouldn’t touch the water in the saucepan.

Next, crush the dark chocolate into small pieces and place them in the metal bowl. The smaller the pieces of chocolate are, the faster they’ll melt, but other than that it really doesn’t matter how you crush the chocolate. When you see that the chocolate is melting, start stirring and make sure there are no lumps.

While the chocolate melts start pouring the milk very slowly. Stir at all times. This is going to help you feel the consistency and stop before you make it too watery, especially if you like your cocoa more creamy. Usually, a glass of milk (250ml) is just enough for a cup of cocoa, but you might like it better with slightly less or more milk. It really depends on your personal preferences, so don’t be afraid to change the amount a little if you feel it’s right.

When the milk blends completely with the melted chocolate, add the maple syrup and the red food coloring. Continue to stir until the color is well-mixed. This usually takes a minute or two.

Turn the stove off, transfer the cocoa into a mug, and leave it aside while you make the white cream. You can always have your red velvet hot cocoa without anything, but I believe some whipped cream on top would really set it apart.

Mix together the cream, sugar, and almond extract in a big bowl. You can use a mixer, a whisk, or simply a spoon, as it’s not much and you’ll probably have even more control whipping it by hand. Once you have a stable cream, shape it over the mug of hot cocoa.

Finally, sprinkle with anything you can find at home, like chocolate chips, coconut flakes, biscuits, cherry, or anything else that sounds delicious.


Prep Cooking time Total Servings
5 mins 10 mins 15 mins 1

Ingredients

For The Hot Cocoa:

  • 1 glass (250ml) milk (optional: plant-based)
  • 60-70g dark chocolate
  • 1 tsp maple syrup
  • 1 ½ tsp red food coloring

For the white cream on top:

  • 4 tbsp whipped cream
  • 1 tbsp powdered sugar
  • ½ tsp almond extract

Instructions

  • In a saucepan boil water over high heat. Turn to medium and place a metal bowl on top of it.
  • Crush the chocolate into small pieces and add them to the metal bowl. Stir while they melt.
  • Slowly pour the milk into the melted chocolate. Stir well.
  • Mix in the red food coloring and maple syrup. Stir for one-two more minutes, then remove from heat. Transfer the hot cocoa to a mug.
  • Whip the cream together with the powdered sugar. Add the almond extract while whipping.
  • Add and shape the whipped cream over the hot chocolate.

Enjoy your delicious treat!

Pumpkin Apple Cider Doughnuts

Appliances Reviewed is reader-supported. When you buy through links on our site, we may earn an affiliate commission.
As an Amazon Associate I earn from qualifying purchases.

“the perfect sweet and sour delight”


Nothing satisfies a sugar craving like a moist doughnut! However, considering the amount of saturated fat they have, you need to ask yourself, are they really worth it? You’ll probably say yes because knowing all this I still wasn’t ready to give up on donuts. However, I began searching for a way to make them a little bit healthier and that brought me to this pumpkin apple cider doughnuts recipe. This way, I can still afford to eat donuts guilt-free!

The first major thing I changed was the cooking method. Traditionally, donuts are deep-fried in oil, while my pumpkin apple cider doughnuts are baked. The taste might change slightly since fried doughnuts are moister and oilier, but the glaze completely compensates for that!

On top of that, the pumpkin puree adds a squashy quality that makes the doughnuts softer and more sugary. The cider adds an intense, apple aroma, creating the perfect balance between sweet and sour.

To make this recipe, you’ll need a donut pan, but a simple baking sheet and a ziplock bag can also be used as an alternative. Also, you’ll need a large mixing bowl and the ingredients listed below. Best of all, you’ll need only half an hour for the whole recipe.

Let’s make some delicious donuts!

First things first, preheat the oven to (180°C) 350°F.

After this, start by mixing all of the dry ingredients in a large mixing bowl. Combine the flour, baking powder, brown sugar, pumpkin pie spice, and salt. When the ingredients are well combined, start stirring in the pumpkin puree, egg, milk, melted butter, and apple cider one by one. Beat the blend for about 5 minutes. The final result should be a smooth dough that’s not too sticky. If it sticks too much, use more flour. Leave the batter aside.

If you have a donut pan, then the only thing you need to do is grease it with cooking oil or melted butter. However, if you don’t have a special donut pan, that’s okay, because you can also make incredibly delicious doughnuts with a simple baking sheet. To do this, place a piece of parchment paper over the baking sheet, then grease it with cooking oil or melted butter. After this, transfer the batter into a ziplock bag and make a small hole in one corner. Use the bag to make doughnut-shaped circles on the baking sheet. Make sure there’s enough distance between them so they don’t merge while baking. If the batter is solid and dense, you won’t have that problem.

When you’re done, place the baking sheet or the donut pan into the oven and bake for 15 minutes, considering the oven is preheated. If you haven’t preheated the oven, then wait for it to heat before baking.

While the donuts are baking, you can prepare the glaze. It’s actually very, very simple, and you’ll only need to combine the vanilla extract, milk, powdered sugar, and cinnamon and whisk until you get a smooth cream. Of course, the glaze is completely optional, and if you prefer some other topping, or maybe filling, feel free to experiment and personalize the recipe to your taste.

When the doughnuts are done baking, let them rest at room temperature for 10 minutes. After, dip each donut halfway into the glaze from both sides. Place it on a serving plate and sprinkle with cinnamon. Enjoy!


Prep Cooking time Total Servings
20 minutes 15 minutes 35 minutes 18

Ingredients

For the donuts:

  • ½ cup of apple cider
  • 1 cup of pumpkin puree
  • 2 eggs
  • 3 cups of all-purpose flour
  • 3 ½  tsp baking powder
  • 1 cup of brown sugar
  • 1 tsp pumpkin pie spice
  • ½ tsp salt
  • ½ cup of milk
  • 3 tbsp butter (melted)

For the glaze:

  • 1 cup powdered sugar
  • 2 tbsp milk
  • ½ tsp vanilla extract
  • ¼ tsp ground cinnamon

Instructions


  • Preheat the oven to (180°C) 350°F.
  • Take a large mixing bowl and combine the flour, baking powder, brown sugar, pumpkin pie spice, and salt.
  • Stir in the eggs, pumpkin puree, milk, melted butter, and apple cider. Beat the mixture until you get a smooth dough. If it’s too sticky, add more flour.
  • Prepare a non-stick donut pan by greasing it with cooking oil – OR…
  • If you don’t have a donut pan, prepare a non-stick baking sheet by greasing it with cooking oil. To make a donut shape, pour the batter into a large ziplock bag and make a small opening in one corner. Use the bag to make donut shaped circles on the baking sheet. Leave enough distance between each donut.
  • Place the donut pan or baking sheet into the preheated oven and bake for 15 minutes.
  • In the meantime, prepare the glaze by whisking together the powdered sugar, vanilla extract, milk, and cinnamon in a small bowl. Stir until the ingredients are well combined
  • When they’re baked, let the donuts cool at room temperature for 5-10 minutes.
  • Dip each donut halfway into the glaze, both sides, and place it on a serving plate.
  • Sprinkle with cinnamon and serve.

Chocolate Red Wine Loaf Cake

Appliances Reviewed is reader-supported. When you buy through links on our site, we may earn an affiliate commission.
As an Amazon Associate I earn from qualifying purchases.

“every bite feels like a warm embrace with exquisite taste”


There’s a saying that goes “You can’t live by wine alone, add some chocolate!” and this recipe does that so beautifully that you are really going to wish you could eat it every day for the rest of your life! At least, that is my biggest wish, as chocolate loaf recipes are my ultimate favorite food, or to put it better, my greatest weakness. Now, I know we can’t eat chocolate red wine loaf every day, and I’m not saying you should, but you should definitely make this recipe for a special occasion, when you want to impress some guests, or when life gets a little hard and you feel like you deserve something exquisite.

Because of the chocolate, the loaf is very soft and sweet with a velvet texture. The wine gives it a little bit of a bitter scent, while the whole cake has light vanilla notes with nutty flavor, due to the hazelnuts. Couple this with the natural sweetness of the chocolate and you get a heavenly pairing.

I haven’t specified in the ingredients list, but if you want to take the recipe one step further you can find the optimal wine-chocolate combination. For example, if you’re using dark chocolate you should use a wine like PX Sherry, Barolo Chinato, Banyuls, Dolcetto, while for milk chocolate is better to use Alsace Pinot Gris, Tawny Port, or other. The delicious relationship between red wine and chocolate is well documented, so you can spend some time finding a combination that fits your preference.

Without further ado, let’s make this perfect treat!

To make this recipe you’ll need a loaf pan, saucepan, parchment paper, a hand mixer (see my top picks here), two large mixing bowls, and one heatproof bowl, aside from the ingredients listed below. You’ll need to spend around 40 minutes in the kitchen and wait for an hour while the cake is being cooked, but trust me, it’s more than worth it.

The first thing you want to do is to preheat the oven to 175°C (350°F). Don’t forget this step, as it will save you a lot of time later.

After this, take a large mixing bowl and combine together the flour, baking powder, cocoa powder, ground hazelnuts, cinnamon, and a pinch of salt. Mix until all the ingredients are fused, then set it aside.

Take another mixing bowl and whisk in the sugar and butter. When the mixture becomes soft and light, stir in the eggs, vanilla extract, and a little bit of wine. Mix for a minute or two, then take the first bowl and start to slowly add the dry ingredients’ blend into the batter. To make sure it’s easy to mix and you have a good consistency, add the wine a little bit at a time, alternating between wine and the dry ingredients. Mix for another minute or two until everything is well combined, then chop half of the chocolate and throw the chocolate pieces into the batter. Mix again.

The next step is to line the loaf pan with parchment paper and grease it with butter or oil. Transfer the batter into the loaf pan and spread it evenly. Place the loaf pan into the preheated oven and let it cook for an hour.

To make sure I’m using my time optimally, what I like to do is make the chocolate glaze around 15 minutes before cooking is complete. This way, I can immediately pour the glaze over and serve it once cooled. However, you can also make the glaze after the cake is baked.

Boil water over high heat in a small saucepan and once the water starts bubbling, lower the heat to medium and cover it with a heatproof bowl. Combine the remaining pieces of chocolate, coconut oil, and mil into the bowl. Stir until the chocolate melts completely then aside. The chocolate glaze will thicken as it cools.

When cooking is complete, take the loaf out of the oven and immediately cover it with the chocolate glaze. Let it cool at room temperature for around 15 minutes then serve. I like to eat it with a glass of red wine and fresh strawberries or raspberries, but it’s totally up to your preference and taste! Enjoy!


Prep Cooking time Total Servings
30 minutes 1 hour 1 hr 30 mins 8

Ingredients

  • ½ cup red wine
  • 8 tbsp butter
  • ¾ cup of brown sugar
  • 3 eggs
  • 2 cups flour
  • 2 tsp baking powder
  • 1 tsp vanilla extract
  • 18 tbsp chocolate (your preferred type)
  • 2 tbsp cocoa powder
  • 6 tbsp ground hazelnuts
  • ½ tsp cinnamon
  • 1 tbsp coconut oil
  • 2 tbsp milk
  • A pinch of salt

Instructions

  • Preheat the oven to 175°C (350°F).
  • Take a large mixing bowl and combine together the flour, baking powder, cocoa powder, ground hazelnuts, cinnamon, and a pinch of salt. Mix well and set aside.
  • Take another mixing bowl and whisk the butter and sugar, until the ingredients are well combined. Stir in the eggs, vanilla extract and continue to beat the mixture. After this, add a little bit of wine and continue to mix.
  • Slowly add the mixture of dry ingredients from the first bowl into the batter. Gradually pour in the wine as well. Mix for another minute or two, then stir in half of the chocolate (cut into tiny pieces). Mix again.
  • Take the loaf pan and line it with parchment paper. Grease the parchment paper with a little bit of cooking oil or butter, and transfer the batter into the loaf. Spread it evenly.
  • Place it in the preheated oven and cook for one hour.
  • Ten to fifteen minutes before cooking is complete boil water in a small saucepan and cover with the heatproof bowl. Add the remaining chocolate pieces into the bowl together with the milk and coconut oil. Stir until the chocolate melts. Set the glaze aside to cool and thicken.
  • When cooking is complete take the loaf out of the oven. Pour the chocolate glaze over and leave it at room temperature to cool for around 15 minutes.
  • Serve with a glass of red wine and/or fresh fruit. Enjoy!

Apple And Cinnamon Fruit Leather

Appliances Reviewed is reader-supported. When you buy through links on our site, we may earn an affiliate commission.
As an Amazon Associate I earn from qualifying purchases.

 “a delicious and easy-to-make version of your favorite childhood snack”

Do you remember eating fruit roll-ups as a child? I know I do! They were so delicious and sweet, with a very mild tarty flavor – simply a perfect snack! Now, of course, you can still buy fruit leather, but why spend money on something that’s made with additives, artificial sweeteners, and god knows what else when you can make fruit roll-ups at home almost effortlessly?

Best of all, you won’t feel guilty about letting your children enjoy this delicious snack because it’s actually healthy! This apple and cinnamon fruit leather recipe is one of my favorite flavors.

The only thing you’ll need to make this apple and cinnamon fruit leather is a blender, a saucepan, a baking sheet, and the ingredients listed below.

Your work in the kitchen is only 15 minutes, but the baking time takes around 3 hours. It’s important to bake the fruit leather on the lowest temperature your oven has, hence the long cooking time, but the tasty fruit roll-ups will make up for that!

The first step is to preheat the oven to 170°C (340°F). If your oven supports an even lower baking temperature – use that!

After this, wash the apples, peel them, and cut them into small pieces. I used Granny Smith apples since they have a very intense acidic taste, which I adore. However, feel free to use whatever apple brand you most prefer.

Next, take a saucepan and place it over medium to high heat. Pour the ½ cup of water and fold in the apples. Bring the mixture to a boil, then add the rest of the ingredients – the sugar, lemon juice, and cinnamon. If you like your roll-ups more tarty and acidic, use less sugar, or add more sugar to make them sweeter. Reduce the heat and cover the saucepan. Stir occasionally while the mixture simmers for around 7-8 minutes.

When you notice that the apples have become soft and start to break down, remove the saucepan from heat. Transfer the mixture into a blender and pulse until very smooth.

The next step is to prepare the baking sheet. Line it with parchment paper and lightly grease it with vegetable oil. Spread the mixture evenly on the baking sheet. Use a spatula to make sure the whole fruit leather is even throughout the baking sheet.

When that’s done, place the baking dish in the oven and bake for around two hours. Check the leather every 30 minutes. Once it has dried out and it’s not that sticky, you can remove the baking sheet from the oven and let it cool at room temperature for 5 to 10 minutes.

Cut the leather into horizontal strips with a knife. I made around 10 strips on one baking sheet.

Finally, roll the fruit leather and serve!


Prep Cooking time Total Servings
15 minutes 3 hours 3 hrs 15 minutes 10

Ingredients

  • 4 medium apples
  • ½ cup of water
  • 2 tbsp sugar
  • 1 tbsp lemon juice
  • 1 tsp cinnamon

Instructions

  • Preheat the oven to 170°C (340°F).
  • Peel and chop the apples into small pieces.
  • Take a saucepan and place it over medium to high heat. Add the apple pieces and ½ cup of water.
  • Add the sugar, lemon juice, and cinnamon. Stir well.
  • Bring to boil then reduce heat and simmer for 7-8 minutes (saucepan covered).
  • Continue to cook until the apples soften and start to break down.
  • Remove from heat, then transfer the mixture into a blender and pulse until smooth and creamy.
  • Take a baking sheet and line it with parchment paper. Grease it with cooking oil very lightly, then spread the apple-cinnamon mixture on the baking sheet.
  • Use a spatula to even out the mixture, making a thin layer all over the baking sheet.
  • Bake for 3 hours. Check every 30 minutes.
  • When the fruit leather is baked, take the baking sheet out of the oven and cut the leather into strips.
  • Roll the strips, serve, and enjoy!

Join Our Newsletter

Never miss a thing! Our newsletter is the perfect way to stay informed about the latest recipes and reviews that we publish.