As an Amazon Associate I earn from qualifying purchases.
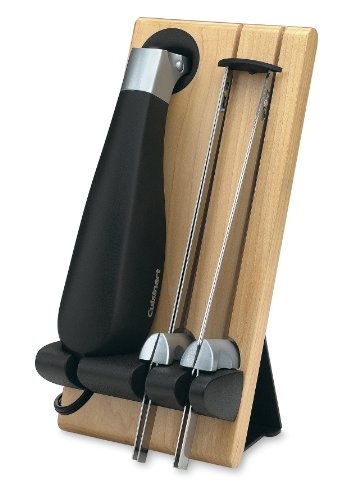
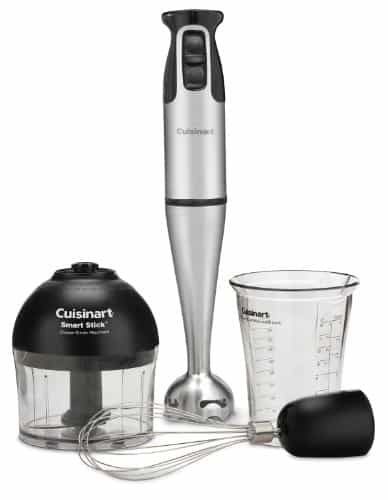
Are you looking for an immersion blender that can replace a number of the kitchen appliances you have stored in your kitchen? Would you love to be able to quickly control the level of blending you can do with one-touch convenience? With the Cuisinart Smart Stick CSB-79, you’re going to get all of the tools you need to get the job done right the first time around! The features of this immersion blender are specifically designed to help you get a recipe completed quickly. The best part? You can save up to 54% on the MSRP of this kitchen appliance by shopping on Amazon.
What Are the Features of the Cuisinart Smart Stick?
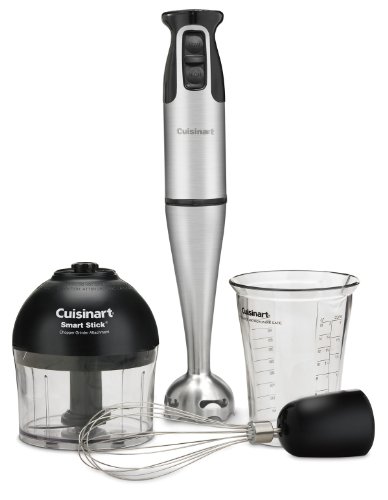
The primary feature of this specific Cuisinart model are the attachments that come with the immersion blender. You receive a whisk attachment that will let you quickly create whipped cream or egg whites with stiff peaks for meringue. The chopping attachment allows you to quickly make pico de gallo or even grind meat if you want to make fresh sausage. Add in the mixing pitcher that comes with the unit and this kitchen appliance gives you the right tools for any recipe to succeed!
There’s also these additional features to consider with this Cuisinart immersion blender:
- this blender is powered by a 200 watt motor that gives you a lot of flexibility when it comes to the cooking chores you need to get done;
- it is equipped with a push button control mechanism that allows for pulse blending or continuous action depending on your needs; and
- the handle has reinforced comfort included in the ergonomics of the design that prevent fatigue and cramping from setting in with prolonged use.
It’s really easy to clean-up after using this immersion blender from Cuisinart as well. You simply detach the units, clean them up in some light detergent, and you’re done. Some of the attachments can even be washed in the dishwasher under certain conditions for added convenience.
Are There Any Advantages To Using This Immersion Blender?
The primary advantage of this immersion blender comes in the design of the blending blade. It’s a reversible blade, which means you can chop with a sharp or a blunt edge if you prefer. This allows you to create recipes with a specific consistency and texture that is supported by the two-speed variable controls. With all of this flexibility, it’s really easy to see why so many people are calling this Cuisinart immersion blender one of their favorite kitchen tools!
If there was one place where we’d wish there were some improvements, it would be to include attachments that would work with non-stick pots and pans. You’re going to scratch even the hardest non-stick coatings with this immersion blender if the attachments come into contact with it. It also can only be used for about a minute or so on some heavy blending tasks before getting hot, which means taking a minute break to let it cool down.
Overall, however, this immersion blender by Cuisinart offers a lot of handy tools for your kitchen that can replace up to three other small appliances quite easily. If you want to improve the quality of your dishes, this immersion blender has the ability to meet your needs with ease!
Click here to view prices on Amazon and find the best deal on the Cuisinart Smart Stick CSB-79.